Friday 12 January 2018

Performance and Character - Weeks 11-14
Short Story

This task, I felt was my chance to create something entirely unique and formed entirely from my imagination, as we were given literally no guidelines other than it had to be no less than 35 seconds. There were several qualities I wanted to ensure that this story and therefore animation met, these being;

  • I wanted the story to allow all of my learning to be applied into this one, large final piece, that includes; walk cycles with different emotional states, momentum, gravity and weight (wall climb), and expressive gestures and poses (dialogue performance).
  • I wanted the story to follow some form of well known narrative structure, such as Tzvetan Todorov's narrative theory regarding equilibrium. This should make for the short story to have a satisfying have payoff and engaging build up.
  • I wanted to have the story have an element of cartoon slapstick, as that is the type of animation that I would love to go into in the future.

After countless attempts of trying to figure out what story to go for, I came across a Simpsons episode with an exceptionally funny moment of slapstick, which on its own wouldn't make for a short story, but I thought that I could build a story around this short moment where Homer kicks a turtle (it's funnier than it sounds).


The way in which I came up to incorporate this, was to have my character 'Blake', late for a work meeting, in the panic of which her runs into a dog who persistently keeps on getting in his way, delaying his arrival further. After several jittery attempts to get past the dog, with the dog successfully blocking his path, Blake looses his cool and boots the dog into the far distance. Filled with immediate regret of spontaneity, Blake attempts to continue his path nonchalantly, hoping nobody witnessed his horrific act.

Below is the reference material that I shot for the story as it stood at this point-


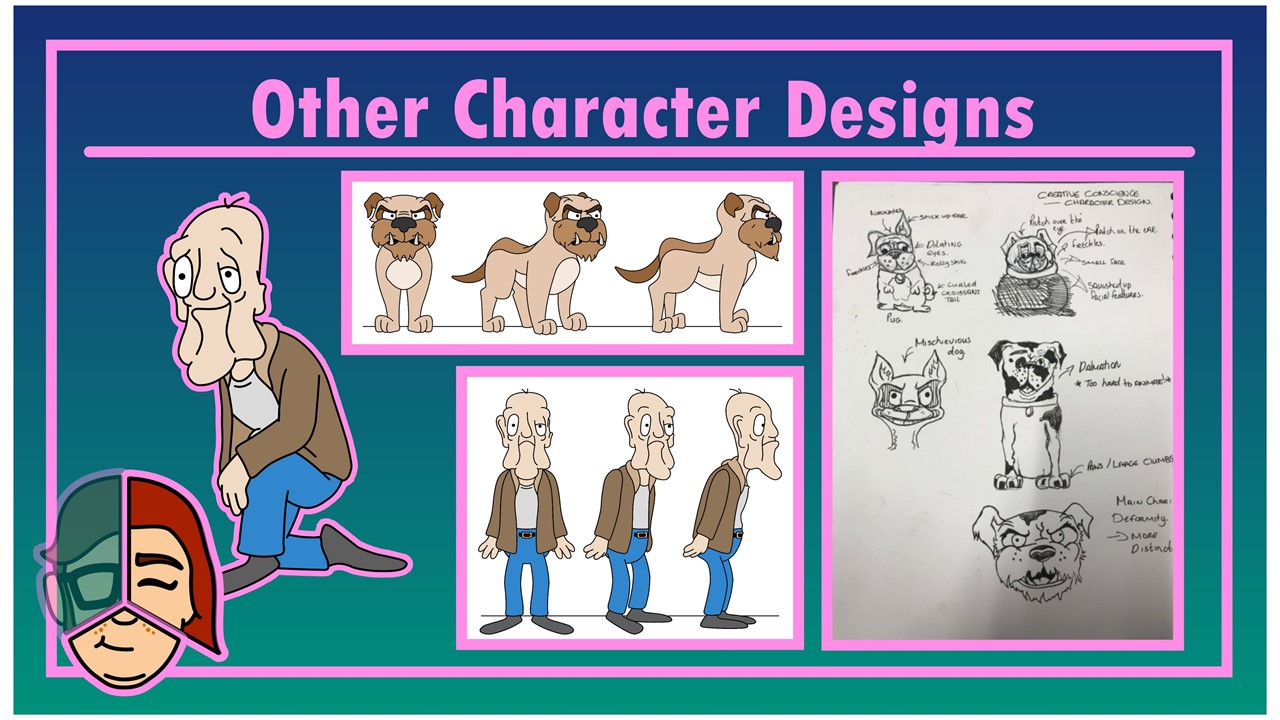
I was fine with this story when it was first developed, as it followed Tzvetan Todorov's narrative theory perfectly, but after a talk with Johny, I decided to add on another beat to the story which would make for a much better ending. Johny suggested that in stories, people who often mistreat animals should have some form of comeuppance. In response to this advice, I though it would be good to add even more of a hint of arrogance to this character by making him walk away smugly after kicking the dog, only to be terrified moments later after seeing a gang of dogs group behind him, proceeding to attack him. This way, the character that I am animating becomes the antagonist, as the equilibrium is restored when dogs (who are the protagonists) get their revenge on him, and due to his attitude, it would be somewhat deserved.

Unfortunately, this meant having to re-shoot the reference material for this animation. Not only did I change the ending in the way that I explained above, but I also attempted to make me reactions more genuine, by having my sister act as the dog, meaning that I no longer have to pretend something's in the way.


As I will be using the same process of animation as I did for the previous animation (asides from the two walk cycles included in the animation), I decided to continue with the pre-production techniques I established in that process. The sheets of which are shown below.

Pages 1 & 2 of animation sheets

Pages 3 & 4 of animation sheets
Page 5 of animation sheets

It was also essential to make up a storyboard for this animation. This mainly helped me through giving a visual idea of how the assets will be distributed, and helped give me a better idea of how to put more of a cartoonish flair and appeal to each key frame, instead of solely working from the reference material.

Page one of storyboards
Page two of storyboards

Below, you can see how the animation looked after I placed every keyframe listed in the animation sheets above. Not much else was done to the animation at this point (asides from the walk cycles). This is a common animation practice and it's known as 'blocking'. After this stage is complete, I add in all the in between frames and make tweaks to the animation.


Below is the final animation


What went well -
  • I have improved upon every aspect of what I wasn't happy about in my previous animation, as I have created my own story, and had a lot more kinetic energy in the character. Both of which I feel I achieved to solid degree.
  • The kick is definitely my favourite part as it had a really good sense of weight and timing.
  • I made it so my story involved the character going through many emotional states, two of which a full walk cycle was fleshed out for. These emotions include; panic, confusion, anger, smugness and fear, all of which I communicated through signature key poses and movements.
What could have gone better -
  • I think from an outsiders view, the story may not be as clear as I intended, due to the fact that the dogs in the story were represented by cubes. this was due to my lack of knowledge on quadruped walk cycles and movements.
  • One of my main anticipations for this piece was that I would be able to utilise multiple camera shots, however I felt it was more essential to show every aspect of the characters performance, but I still feel that certain camera angles would have helped to convey the story in a more dynamic way.
  • Unfortunately the piece didn't reach the 35 second demand that was set in the brief, meaning that I had to extend certain holds out for longer, which I feel negatively affected the pacing and made certain segments too slow.

What I will change next time -
  • I will make sure to diversify my range of knowledge of how different creatures move, therefore allowing me to represent other creatures through more recognisable figures.
  • For my next animation similar to this, I will experiment with how different camera angles assist in communicating the story with not only the performance, but in direction.
  • Before going into the production phase, I will ensure that my reference material is or has the ability to be stretched to the brief demands. 
Performance and Character - Weeks 9-10
Dialogue Performance

This was the animation that I was most looking forward to when I first read all of the tasks, because from experience from my previous non uni related animations, a voice, I always find is the finishing touch to giving life to characters, so to apply the professional animation practices that I have used in this module to a voice clip would likely result in a final product that I am extremely happy with.

Before I could start any pre-production work, I first had to select what voice clip to use, as there were several options. This is another piece where emulating emotion is a primary goal, therefore I picked one where the subject has a clear, strong and expressive emotion. The one that I ended up with was a voice clip (from who I believe is Tom Hanks?), which consists of the following:

"I thought... that, if I could help him in some way, get him this *urm* this girl that he loves... that maybe, you know... things would change for ME"

From analysing this voice clip, I can decipher the following about this character

  • The phrase 'things would change for ME', suggests that this character is self centered and only tends to think about himself
  • He shows a lot of passion in what he says, meaning that he will likely emote his body with what he is saying.
  • Due to the way in which he is speaking to whoever he supposedly talking to, it appears as though he is close to them, and opening up to them, therefore I will ensure to show some form of empathy emitted from the character to the other occupant.
  • The way in which he speaks suggests he is cocky, the line 'things would change for ME' also suggests this. This would mean that for the most of the animation, he will have an open posture, as that is how confident people present themselves.


An illustration showing the difference between open and closed bodies, with the open ones showing more confidence to one another
Lip syncing was something that I've always aimed to be competent at, and feel as though in the field of 2D animation, I have enough knowledge to pull it off. It was for this reason that at first I decided that I would delve into 2D animation, after promising to do so previously in the topic. I decided against this however and remained with my good ol' trusty Keith rig, the reason being that it was too late in the module to learn new software so I may aswell perfect the ones I've started. This has made me realise that I should start on learning any software that may be beneficial towards a brief right after reading a it

As the main emotion that I will be emulating is anger, I briefly researched angry key poses, and found a secondary resource image of some dynamic, angry poses, and what to avoid.


Below is the reference material that I recorded for this dialogue performance. For this, I had the sound clip running on loop, whilst I spoke along with what the character says, so that the actions would appear more genuine. The footage came to over 5 minutes, but I managed to trim it down to one take that I felt did justice to the voice over. 


Unfortunately, the method of pre-production that I established in the previous two animations wouldn't be applicable for this animation, as I am no longer working with a looping cycle. This caused me to come up with a new way to record, as I was never keen on the bar sheets. This new design of production sheet is a lot simpler, however a lot more informative, as I have listed the point at which every action from every moving part would start, reach key pose, pause and end (if applicable). This was handy as the timings are perfectly aligned with the reference material, although I knew intended to alter these slightly when it came to production to help build anticipation and follow through for certain moments. The only thing that this lacks is a visual element, but despite that, I found it a lot easier to follow than all the other sheets I used in this module, showing that I may not be as much of a visual learner as I expected.

Dialogue Performance Timings
When animating, I created a floating sphere which would act as a point of reference for the character, therefore preventing the character to appear as though he is looking into space.


Below is the final animation


Below is the final animation overlapped over my reference material, in order to show how how faithful I was to it, and the adjustments that I made for the better.


What went well -
  • Every action is perfectly synced up to the dialogue performance.
  • Although for the most part the timings were translated accurately from the video reference material, I still managed to emphasise some movements and poses and add in some anticipation for a more emotive and entertaining performance.
  • Due to the fact for the most part the feet remained static on the ground, I was able to focus more on the upper body movements, which I perfected to the best of my ability and completed relatively quickly. I also enjoyed making this more than I did with any other animation in this module.
  • Due to the fact that I kept a close eye on the graph editor, all movements flowed in the way I intended, with no sudden jumps.

What have gone better -
  • Although I was pleased with how it turned out, I think that perhaps if I made the character move about more, it would help liven the piece up and make for a more cinematic experience.
  • I would have liked to have completed this task with either a comedic voice clip from something that I enjoy, or create my own VO entirely, as I feel this would add a more personal element to the piece.

What I will change next time -
  • I will make sure to create something that I have fabricated out of my own imagination, therefore meaning that I can create my own story and feel more personally attached to the piece.
  • I will make sure to make the character move about more for my final animation, as it would allow me to familiarise myself more with the weight and manoeuvrability of my characters. 

Thursday 11 January 2018

Performance and Character - Week 8
Child Full of Joy Walk

After feeling confident that I produced the previous task to the best of my ability, I decided to make a start on the 'Child Full of Joy' walk. I found the way in which I produced my animation in the previous task to be effective, therefore I decided to use a similar practice to make this one.

Unlike the other walk cycles, I do not only have to study how the emotion affects their cycle, but also their age and therefore their proportions. It was for this reason that I at first decided to look into working with an alternative rig, one that more closely resembled the proportions of a child.

Secondary resource illustration showing how proportions change with age 
After measuring up the Keith rig against this graph, I noticed that he is roughly 7 heads tall, meaning that he is most similar to a 10 year old. As I feel very confident with the Keith rig, I decided to continue using him, as a 10 year old is still a child, and this way I can show more clearly how movements differ in different circumstances as the rig won't be altering between animations, making them easier to compare.

Aspects about the character that will affect performance :
- I will have this character be the height of 4ft"10, as this is the average height for a 10 year old boy, meaning that there is more of a chance of people understanding the age of the character, I will research how height and more specifically, age affects a walk cycle bellow.
- This character will be slightly overweight, I felt as though this aspect of the character will help to emphasise reduced height difference from the others, and would likely mean that there would be more of a 'waddle' from side to side.
- This character will be care-free, therefore having a very happy emotion, which will again be studied in depth below. As there is no particular aim for this character, he may not travel as straight forward or sequenced  as the other walk cycles.

The situation :
I imagine this character to be cheerfully walking home after the last day of school, having planned a sleepover at his best friends house for the next night earlier, therefore not having any worries, and a lot to look forward to. I kept this story relatively simple, as I don't think there is much point in fleshing out a story any more than that, as none of it will come up in the short animation.

Child walk secondary research

A very young child walk cycle. Notice how far the legs and arms swing outwards.
Another child walk cycle.
Things I learnt about a child walk -
  • Legs tend to swing outwards, not just forward.
  • There is a lot of space between each foot placement.
  • The sequence almost feels like a march, as kids tend to stomp their feet more aggressively with each step. 

Happy walk secondary reseach
A breakdown of a very cheerful character's walk cycle. Notice how the body twists with the arm movements, meaning that there is more force behind them.


This is much more of a cartoon-style example of a happy walk cycle. Notice how much the up poses are emphasised.
Screenshot from a youtube video explaining walk cycles

Things I learnt about a happy walk -
  • Body twists from side to side, following with the arm movements.
  • The arm movements are two frames ahead of all the other movements, as the 
  • The sequence almost feels like a march, as kids tend to stomp their feet more aggressively with each step.
  • The contact poses are emphasised by having the take to longest to complete.
  • Body is ached backwards, with the forward legs and arms being well ahead of the head placement.


With all of this information in the bank, I then proceeded to go through the same process as I went through on my previous animation, recording my own reference material and producing my own animation notes and illustration sheet.


'Joyful Child' animation sheet

Below is the final animation

https://vimeo.com/243617454

What went well -
  • I feel as though I have somewhat achieved the 'double bounce' walk cycle, something that had always interested me yet I never thought to work on. This cycle has always interested me as it is something very suited towards cartoon-style animation, my main area of interest.
  • The animation feels very lively, probably due to all the 'Overlapping Action' that I included by having many joints moving simultaneously within their own cycle, this is perfect for the context as a child of that age would likely be very lively.
  • I think that I have successfully incorporated both defining features of this character into the walk cycle, them being his age, and his mood, meaning that I have learnt a lot with this exercise.
What have gone better -
  • I am disappointed that I wasn't able to capture enough research on how a child walks so that I could successfully emulate a younger child, as a 4-7 year old would have been a lot more interesting and offer something else from my previous walk cycles.
  • Due to the way in which I animate, having repeated sequences, I wasn't able to successfully get the random foot placements included, meaning that the cycle seemed too straight, direct and non reminiscent of how a child would walk when joyful.

What I will change next time -
  • I will look into experimenting with animating characters of a more diverse age range in the future, thus gaining me more knowledge of how age affects movement.
  • I will make sure that if the foot placements are following a random pattern, I will adapt the way I animate by positioning each placement manually after the initial sequence.


Performance and Character - Week 7
Rejected Lover Walk

Due to the help that I received previously with my 'wall climb' animation after showcasing what I thought was the final piece to my peers, I thought it would be a good idea to do so with my 'Limp' animation, and as it is a much shorter and simpler animation, I could easily act on and change the issues raised providing they're not too major.

There were three main issues that were brought up whilst showcasing my work that I think I have managed to solve in my latest version, these were as follows -
1. Someone commented that it looks as though that instead of walking with a limp, the character instead seems to be attempting to walk with a prosthetic leg, due to the fact that the character doesn't appear to be trying to hard to avoid putting pressure on the injured leg.
2. Both arms seemed to abruptly change direction whilst completely altering the momentum, meaning the motion isn't smooth and looses all flow.
3. The injured foot seemed to slide across the floor too much.

These problems were resolved in the following ways -
1. I sped up the timing briefly after the injured foot makes contact with the ground, and minimised as much bend in the knee of the injured leg as possible.
2. I deleted unnecessary key-frames and added more easing.
3. I checked the translation of the foot across the Z and X axis and made sure that the numbers stayed the same whilst on the ground.

Below is the updated, final version.


Once all the adjustments were made, I then proceeded to make a start on the 'rejected lover walk'. I chose this as appose to the 'thoughtful lover walk', due to the fact that I would be animating a walk in a cheerful mood in the next animation task (joyful child), therefore to show better contrast, it would help for me to produce a walk which would work with an alternate mood.

As with all these exercises, I at first proceeded to create the bio. This time however, I learnt from my previous mistakes and didn't include information that I felt would be unnecessary and therefore won't affect the outcome of my animation.

Aspects about the character that will affect performance :

- The character is male, therefore I will ensure that the foot placements resemble a typical males pattern, as male tend to take larger footsteps with each placement having more space between them horizontally. I chose to have a male character to help from a narrative side of view, as it is more often typically portrayed in media for the male to be the rejected one in a relationship, therefore adding familiarity to the piece.


Segment from the book 'Animators Survival Kit' in which foot placements are examined
- The character will be in a extremely depressed and upset mood, having being just rejected by his crush, this will mean that I will have to put in a lot of research as to how people typically manoeuvre whilst experiencing this feeling. The research is locate bellow.
- The age of the character will be 17, as I feel as though at this age, a rejection from a lover would cause a lot more of an upset, therefore allowing me to show a much more extreme reaction for the character, making for a lot more of an expressive and interesting walk cycle. The fact that my character is 17 will also affect the mobility, as he is young he would likely move quicker with more flexibility in his joints, though these characteristics will be affected by other details about the character. I will show his age by making his arms and legs move smoothly in the joints as appose to a more stiff movement.
- The character will be 6f"3, I chose this height as I feel that a taller than average height would help to empathise his arched posture and 'slugglish' movements, therefore making it more clear how he is feeling.

The Situation :
My character is walking back after meeting up with his soon to be ex-girlfriend by her request. During their meetup, she explained that it wasn't working out, due to his lack of communication and the fact that college work is his priority. My character expected this to be the case before setting off, but kept as optimistic as possible, whist making sure to present himself in the best way possible to improve his chances of securing their relationship. When told the news, my character sluggishly drags himself back home, having deep regret for what he has done.

The story I kept as simple as possible, whilst still giving myself enough depth to get in the mind of the character, assuming how he would react in this situation, thus allowing me to create more of a grounded and clear character performance.

As I previously mentioned, in order to portray the emotion of sadness in my animation, a lot of research would be needed to emulate it accurately. Below is the secondary researched that I collected for this purpose.

An animated gif, showing a very exaggerated, cartoon walk cycle. Notice how the feet scrape across the ground and lift is minimal.

A much more naturalistic response, yet still portraying the emotion clearly. Notice how in this instance, the subject has a very closed posture, whereas the others are more open, this would likely to be because of the subject's shyness.

A breakdown of how a depressed walk differs from a generic walk cycle in terms of timing and position. Notice how the 'down' pose is stretched out in terms of timing.

The 'shuffle' segment in the image above closely resembles a sad walk cycle.
From all of this secondary resource material, I can conclude the following should apply to my following walk cycle animation:

  • Back should be arched, the extent of which will be determined by the whether not I will aim for a naturalistic animation or not
  • Foot lift should be minimal, with the feet scraping across the ground
  • Arm movement should be minimal, however any movement should be coming primarily from the elbow, not shoulders
  • Head bobs up and down with the body
  • Down poses should be exaggerated and take more time to complete
  • The character should take shorter strides

The next step was to record myself performing my primary reference material. I kept what I have established as a character in mind, but I understand that many different people would show sadness in many alternative ways, so I knew that my vast array of secondary research would assist the way in which I interpret this footage, thus allowing the emotion to be as easily communicated as many others as possible. I felt that the timings in my primary material were solid enough to be translated in the final animation, however.


This time, instead of simply noting down at what frame each pose in the walk cycle occurred and then converting that into a bar sheet, I produced a simple illustration for each how I envisioned the character to look at each signature pose, along with any notes that I felt were essential to keep in mind when animating. I found this a lot more helpful than I found working from a bar sheet, as it was laid out in a way that I found more comfortable to read from. As the animation is a cycle, a segment of frames will be looped, therefore meaning that I don't find it necessary to list out every repeated frame, allowing me more space to focus on how the walk should look. This method also helped me gain more of an idea about how my character would look, thus creating even more of an identity for him.

Rejected Lover animation sheet
I understand that in the industry, I will be required to work via guidelines that are set by the company, therefore meaning that I wouldn't necessarily be aloud to personalise the making of material to this extent. I assume this is so that if another animator were to pick up my pre-production material, they would be able to understand it and animate from it with ease. For the purposes of this animation however, I will stick to this method. Below is the final product.


What went well -
  • This piece was focused on how an emotional state would affect a walk cycle, as appose to the previous exercise where we focused on how a physical impairment would affect the same. This meant that if my rig had facial controls, it would be somewhat of a cheat, as that can easily be adjusted to portray the emotion. However, I wanted to see if I could portray the emotion solely through the movement, and I feel as though I have done so successfully.
  • The way in which the feet scrape and then quickly flop back onto the ground really adds an element of cartoon charm to the piece, as well as further insinuating the fed up nature of the character.
  • Unlike the previous animation, This took a lot less time to produce, as each foot moves the same as the other, meaning that I only had to work on fleshing out one step, then repeating that step in a mirrored manor.
  • Certain animation principals were utilised to emphasise the mood of the character, such as 'follow through', as seen when the head continues to drop for a few frames after the body starts to raise back up, and 'arc', as seen through the arched trajectory of the limb and joint movements, thus preventing the movements to appear stiff and mechanical.
  • I feel as though every aspect of the character that I knew would affect the way in which he moves, has been successfully applied.

What have gone better -
  • The way in which the feet move sometimes makes it seem as though the character is either trenching through mud or wearing very heavy shoes. This was because of how much 'exaggeration' I included, in order to create more of a 'cartoon' styled response.
  • I feel as though the arms sometimes move suddenly and quickly, out of sync with the rest of the body flow, this was because the hands kept phasing through the legs, due to the rig's oddly shaped legs, so I had to adjust them slightly to prevent this from happening, unfortunately causing the flow of the animation to be off.
  • After showing other people my animation, there were a few instances in which people assumed that the character was just tired, as appose to depressed. After studying my animation again, I realise that this is likely due to the head movement, as it is facing down too much, when in reality, it should stay more upright whilst sinking down into the shoulders, however there isn't a control which allowed me to do as such in this rig.

What I will change next time -
  • Make sure the rig that I am using has all the controls necessary for the task in hand.
  • Check with more people before finalising my piece, in order to see whether or not they interpret it as intended.
  • I will ensure that all of the curves are correct on the graph editor, thus ensuring flow remains constant throughout.


Monday 11 December 2017

Making of Integrated Practice- 
Week 12
Evaluation for Making Of Video

https://www.youtube.com/watch?v=fqArUAAsMrc&t=496s

In previous modules, I always enjoyed producing making of videos, as I feel its the best way to communicate your processes of production, and this was no exception. Josh took charge of the editing, but I was always there to overlook what's going on, whilst suggesting certain additions, as did Chloe.

What went well
  • We included a wide variety of footage in order to keep the 11 minute video diverse enough to keep audiences attention, the types of footage that we included are as follows; behind the scenes recordings, screen-records whilst working on project, showcase of final work, clips from external sources that inspired us and more!
  • From past experiences, I have realised how essential it is to record my process of animation whilst it is taking place, which I done so this time, and it is shown at a couple of times in the final video. I done this as I use non-typical techniques for animation, therefore by visually showing how I animate, it builds a much better insight for the audience than me simply explaining it.
  • I designed certain graphics which pop up with some text throughout the video, explaining where an external source came from, which not only gives a consistent sense of design which mirrors our team logo, but also adds an extra layer of professionalism to our video, as that is what many industry videos of the same nature do. 
  • I feel like 11 minutes is the perfect length for what we had to showcase, it has no filler and we never brush upon potentially important topics. Anything over 15 minutes or under 5 wouldn't be suitable for what we produced.
  • The video is structured in a way that it does justice to the work that each of us put in, as we all get roughly the same screen-time, which is suitable as I feel that we more or less distributed out the job roles equally throughout the project.
  • Not only did we have a variety of shots, but I think we also had a lot of varied locations included, which once again, offers something new for the viewers to see every now and then. These shots consisted of; Green screen room, Foley studio, working environment and more!
  • A very simple touch that I liked was something that Josh added to the piece, and that was a small clip of footage from each of the English writing students that helped us out, where they explain what they like about how the story has turned out. It was a good touch to have our collaborations give some feedback on the project as appose to it being all us three.
  • Something that I dislike doing in projects such as these, is treating it too seriously (obviously dependent on the context), so it was very satisfying to add an overly cheesy, fake and hilariously bad (on purpose) introduction, complete with 80's sitcom music.

What could have been better
  • As we have a video file of us narrating, I feel that at times we might have relied too much on showing that footage, instead of opting to show something else potentially more informative on screen, as no real value is added to watching us speak. This was handy to have however, as it meant we always had something to show.
  • This isn't an issue with the making of video necessarily, more with the project, but I think the fact that I didn't fail to any large extent, meant that I was more descriptive rather than evaluative in my narration. This was likely because I didn't take to many large-scale risks therefore never had to work around problems, making for somewhat of a more bland commentary.

What I will change next time
  • Instead of tending to talk about the work that came out of the project, talk more about issues I faced, as that makes for a more entertaining video.
  • As I said, I like adding elements of comedy to these types of videos, so it'd be refreshing to keep a humorous tone throughout, making for a more entertaining and original video. 
  • When recording the making of narration, due to the fact that none of what I said was scripted, a lot of things came to me after recording that would have made good talking points for the video, and as we no longer had access to the professional studio that we used to record our audio, I couldn't add them at a later date. This has shown me the importance of planning what it is I want to say, which is definitely something I will keep in mind in future projects.
Creative Collaboration- 
Final Group Presentation

As another way to present the work that's gone on throughout this project, we were tasked to perform one final group presentation. Due to my disappointment with not being as active as I could have been whilst creating the production bible, I opted to design the presentation, therefore having another opportunity to utilise my graphic design passion. Josh listed what he thought we should cover throughout the presentation.

In terms of the Powerpoint slides, I tried to keep them simple, consistent and clear, as I felt it was the work that needed to be the central focus. I used the team logo that I designed as a way to indicate who's responsibility it was to speak for the given slide, a method which proved to help flow a lot whilst presenting, as well as adding a personal touch to the presentation. I included as little text as possible, in order to prevent our eyes from being glued to the screen, reading word for word what our audience can plainly see.

As I said in a previous blog post, I am not the most confident during presentations, however I was a lot more so going into this one, this was probably a combination of being enthusiastic about our work, and the fact that I am presenting with two others. After completing the presentation, I am satisfied that I mentioned everything that I intended to say, but I still have a lot of room for improvement, as I was still prone to not making much eye contact with my audience.